The LEXON MINA lamp is my 3-year-old daughter and my wife’s favorite.
One day, while they were playing hide-and-seek under the blanket, it finally got wrecked.
When I came home from grad school, the lamp had passed away.
I thought about sending it in for after-sales service, but since it’s imported as a finished product, A/S turned out to be impossible.
Instead, if it breaks within a year of purchase, you can buy a new one at a discounted price.
So I decided to fix it myself.
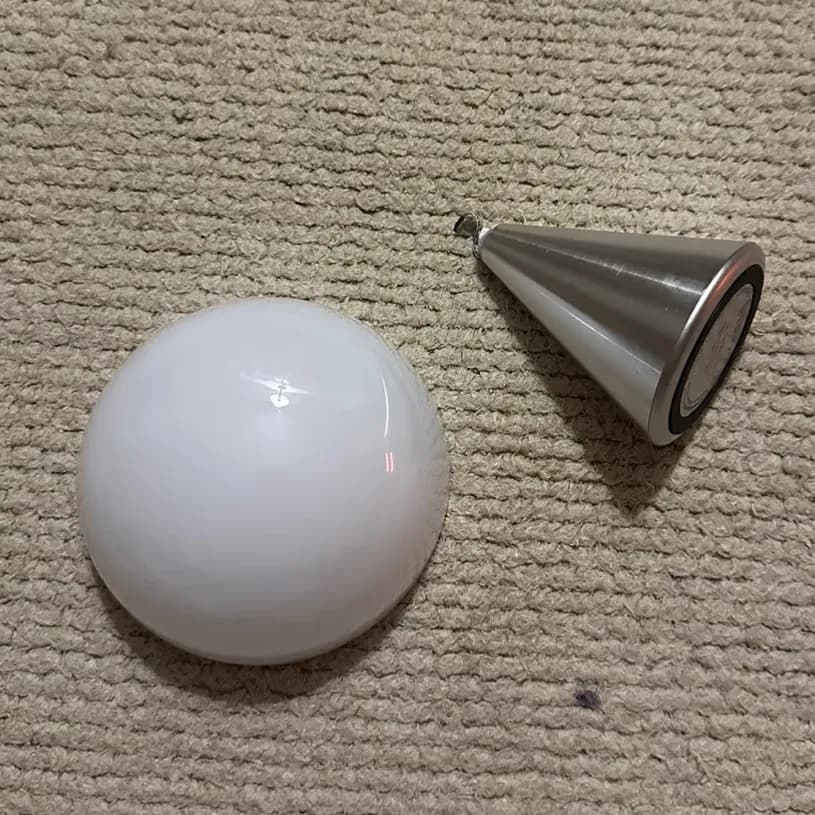
1. Disassembling the LEXON MINA Lamp
First, separate the top part of the lamp from the bottom plate.
The two parts are glued together, so you can gently work them apart by prying around with a thin tool like a spudger.
Think of it as similar to taking apart an iPhone.
After opening it, I checked whether the bulb inside was still alive.
Fortunately, the connector had just come loose; both the bulb and the connector were intact.
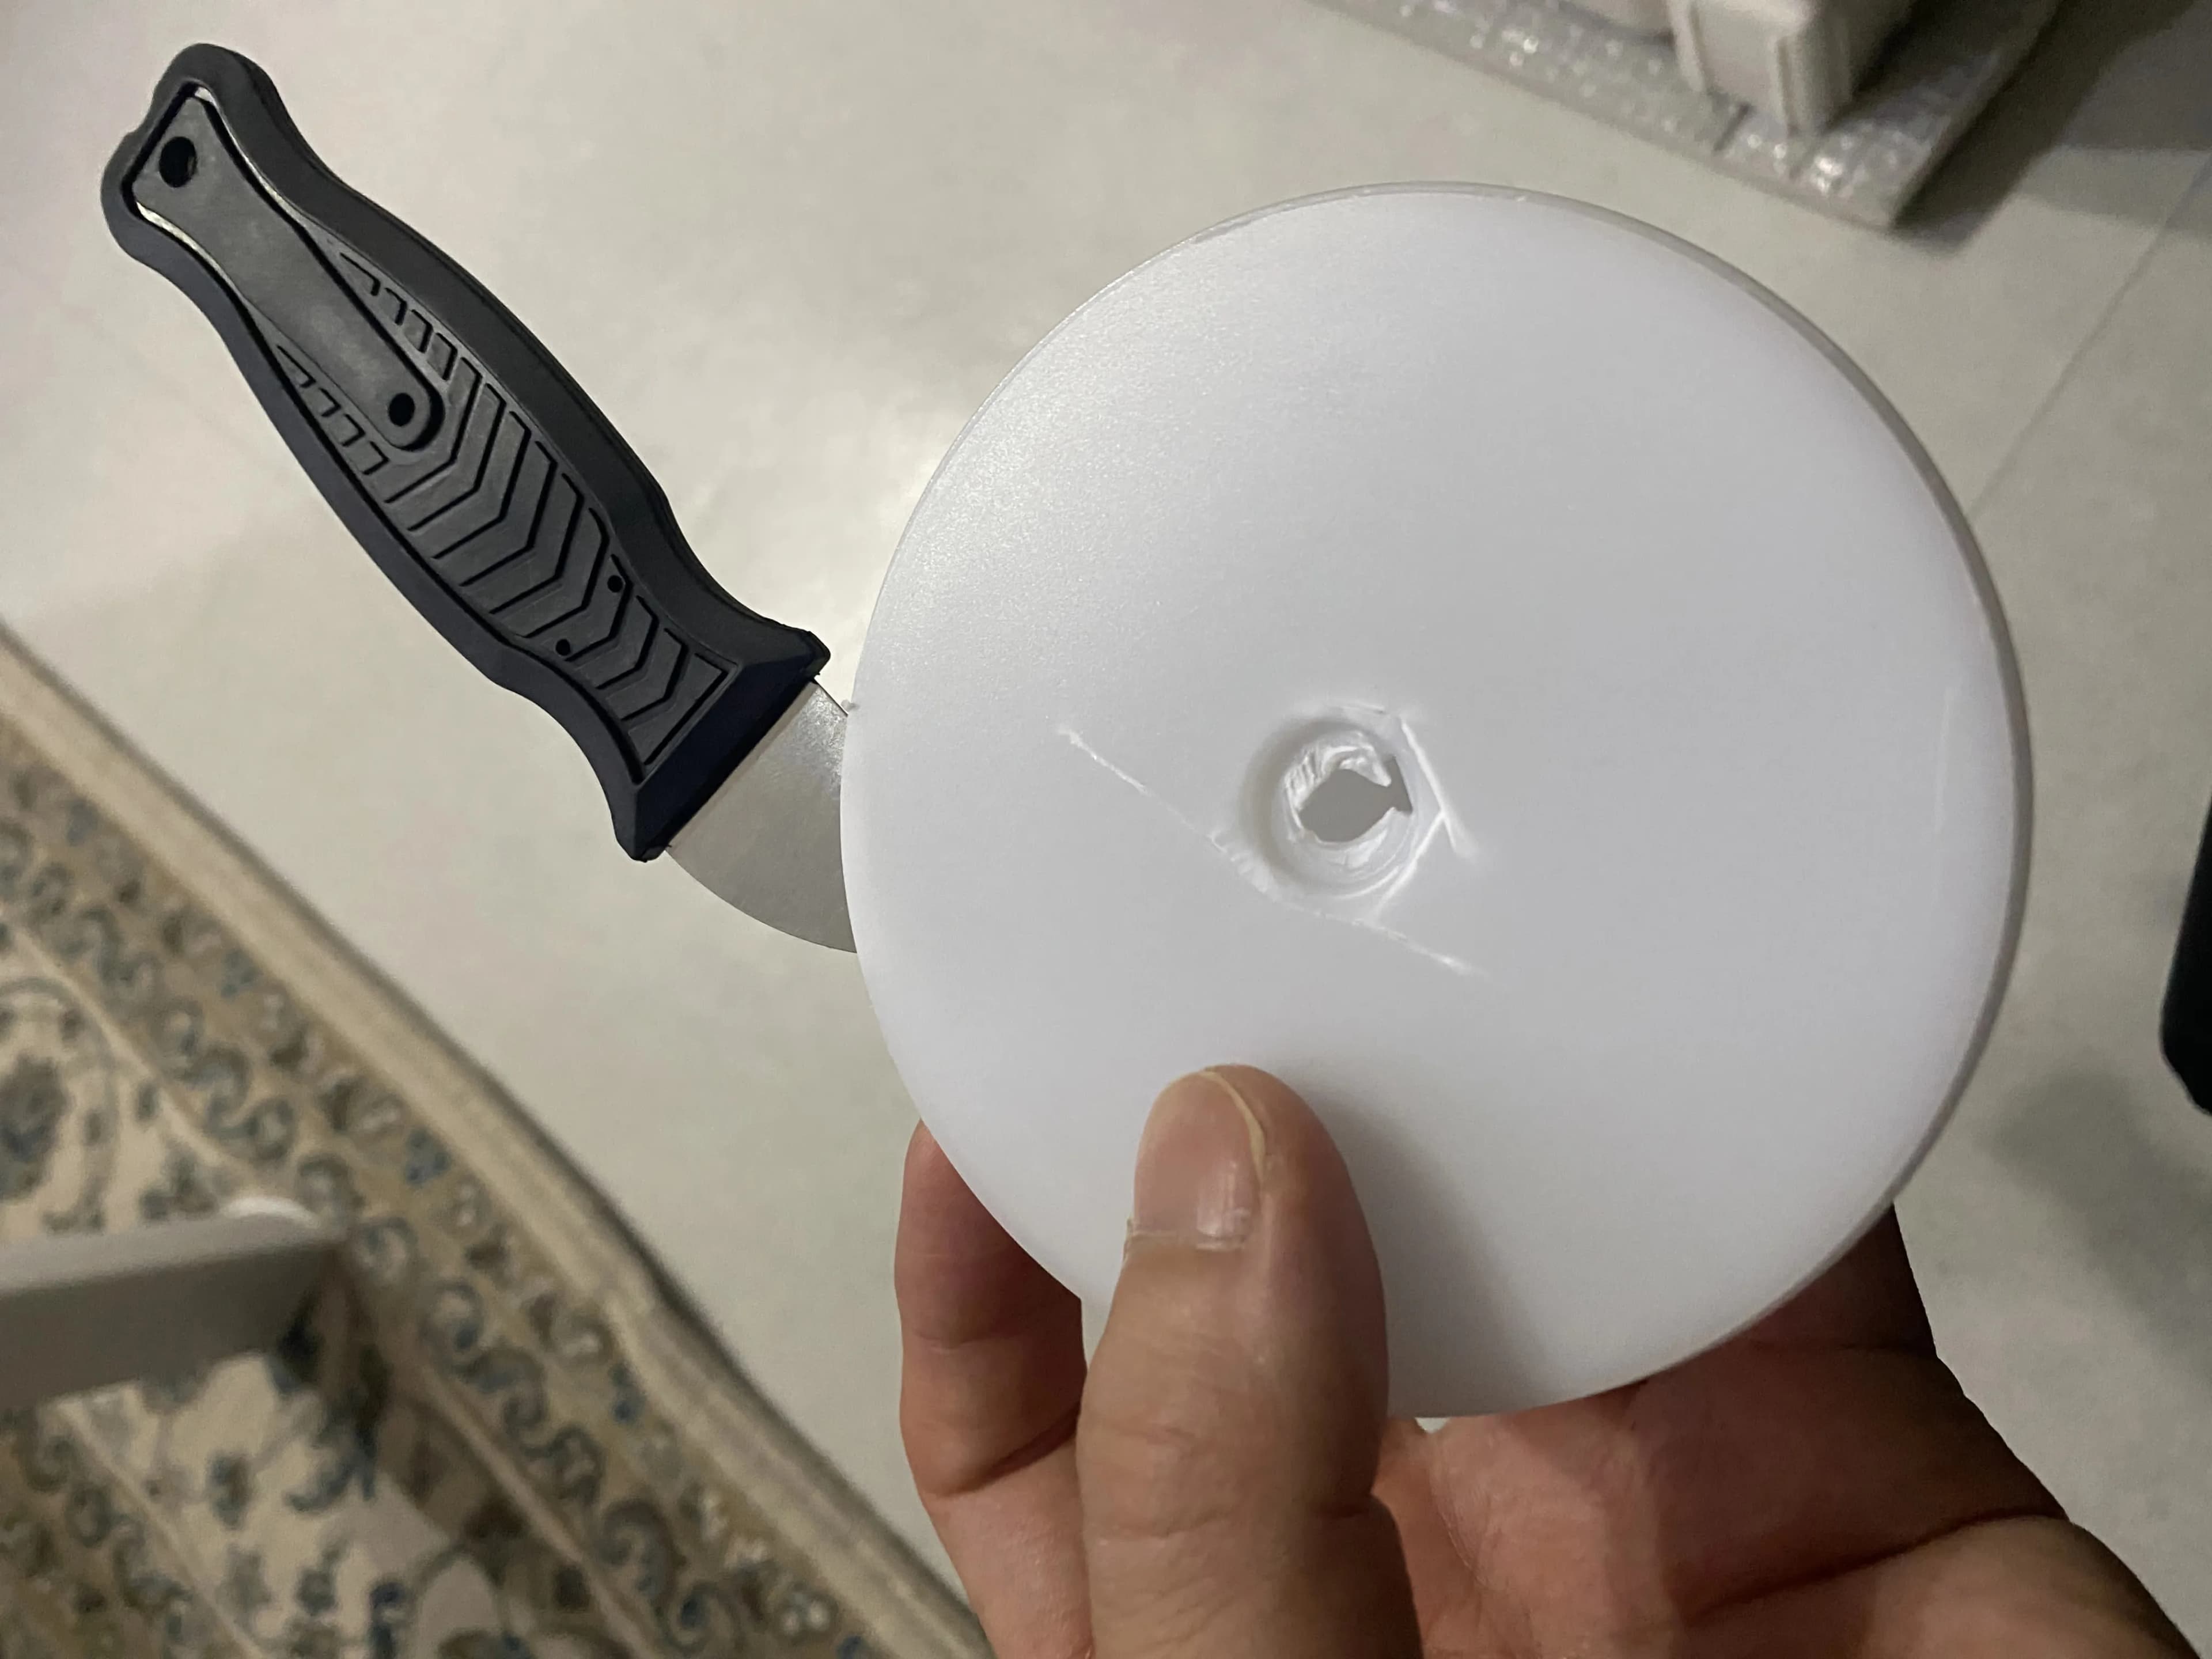
Now let’s separate the lower body.
If you peel off the rubber pad on the bottom, you’ll find three screws.
Unscrew all of them.
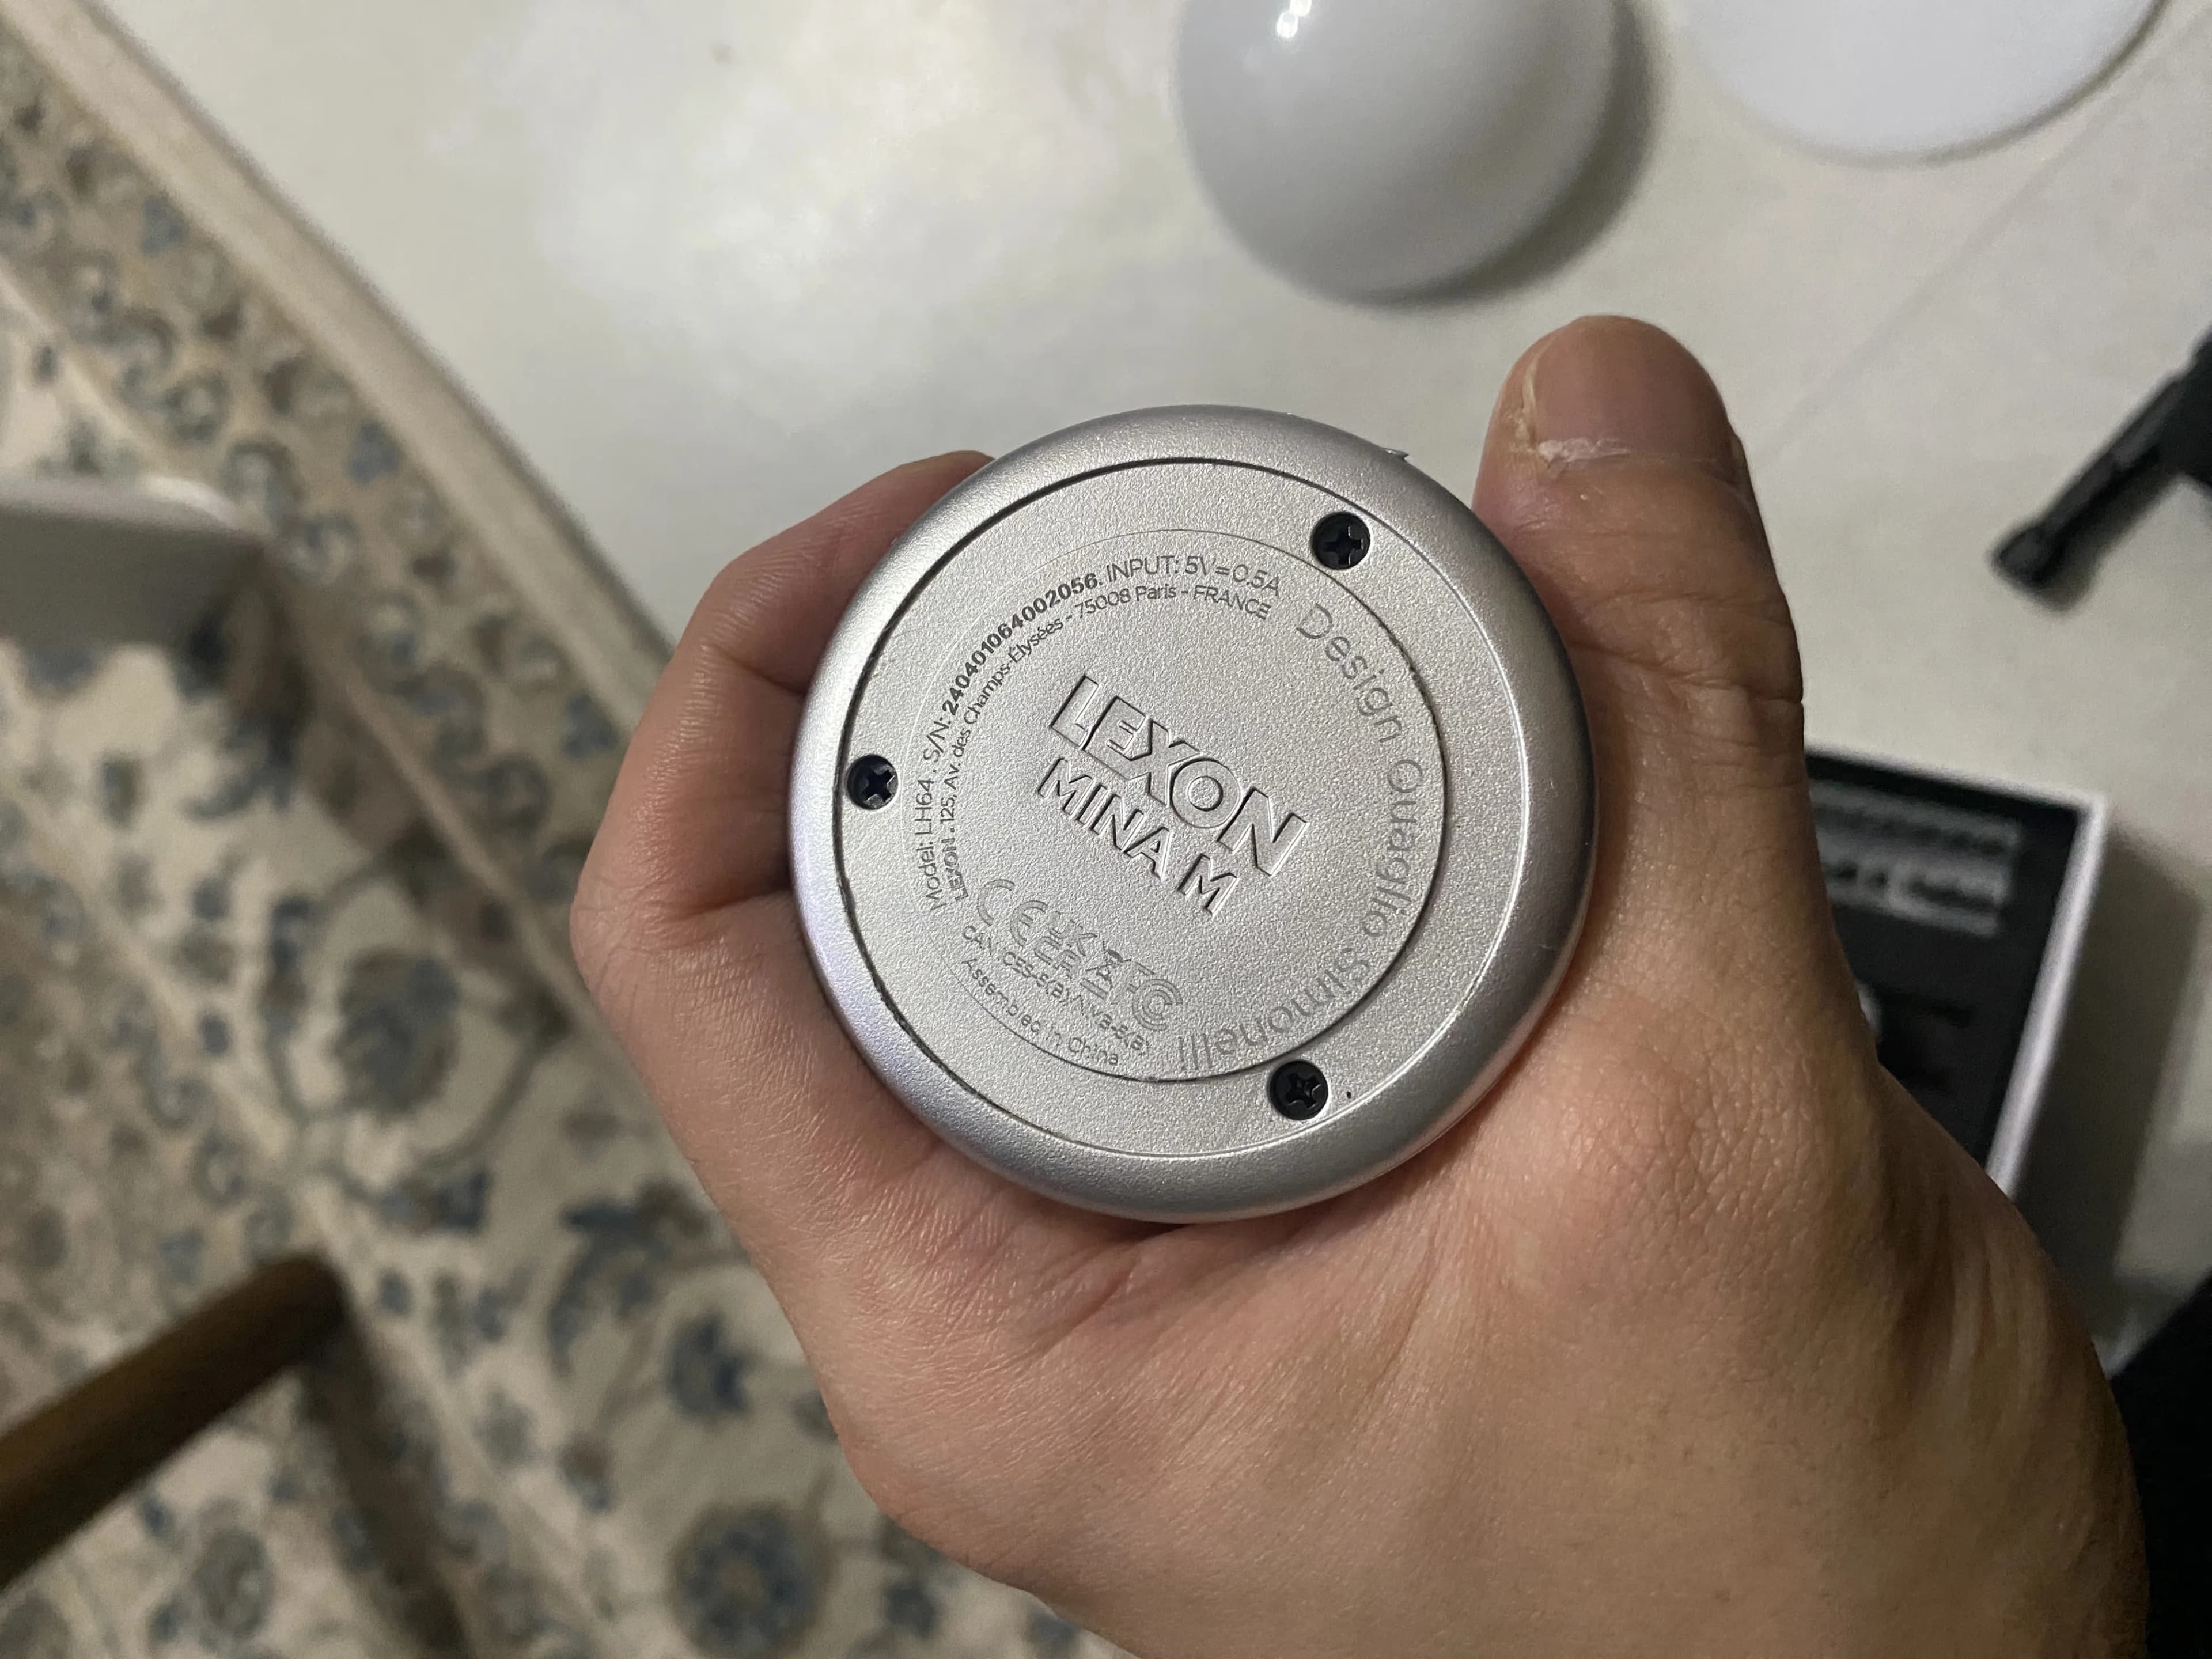
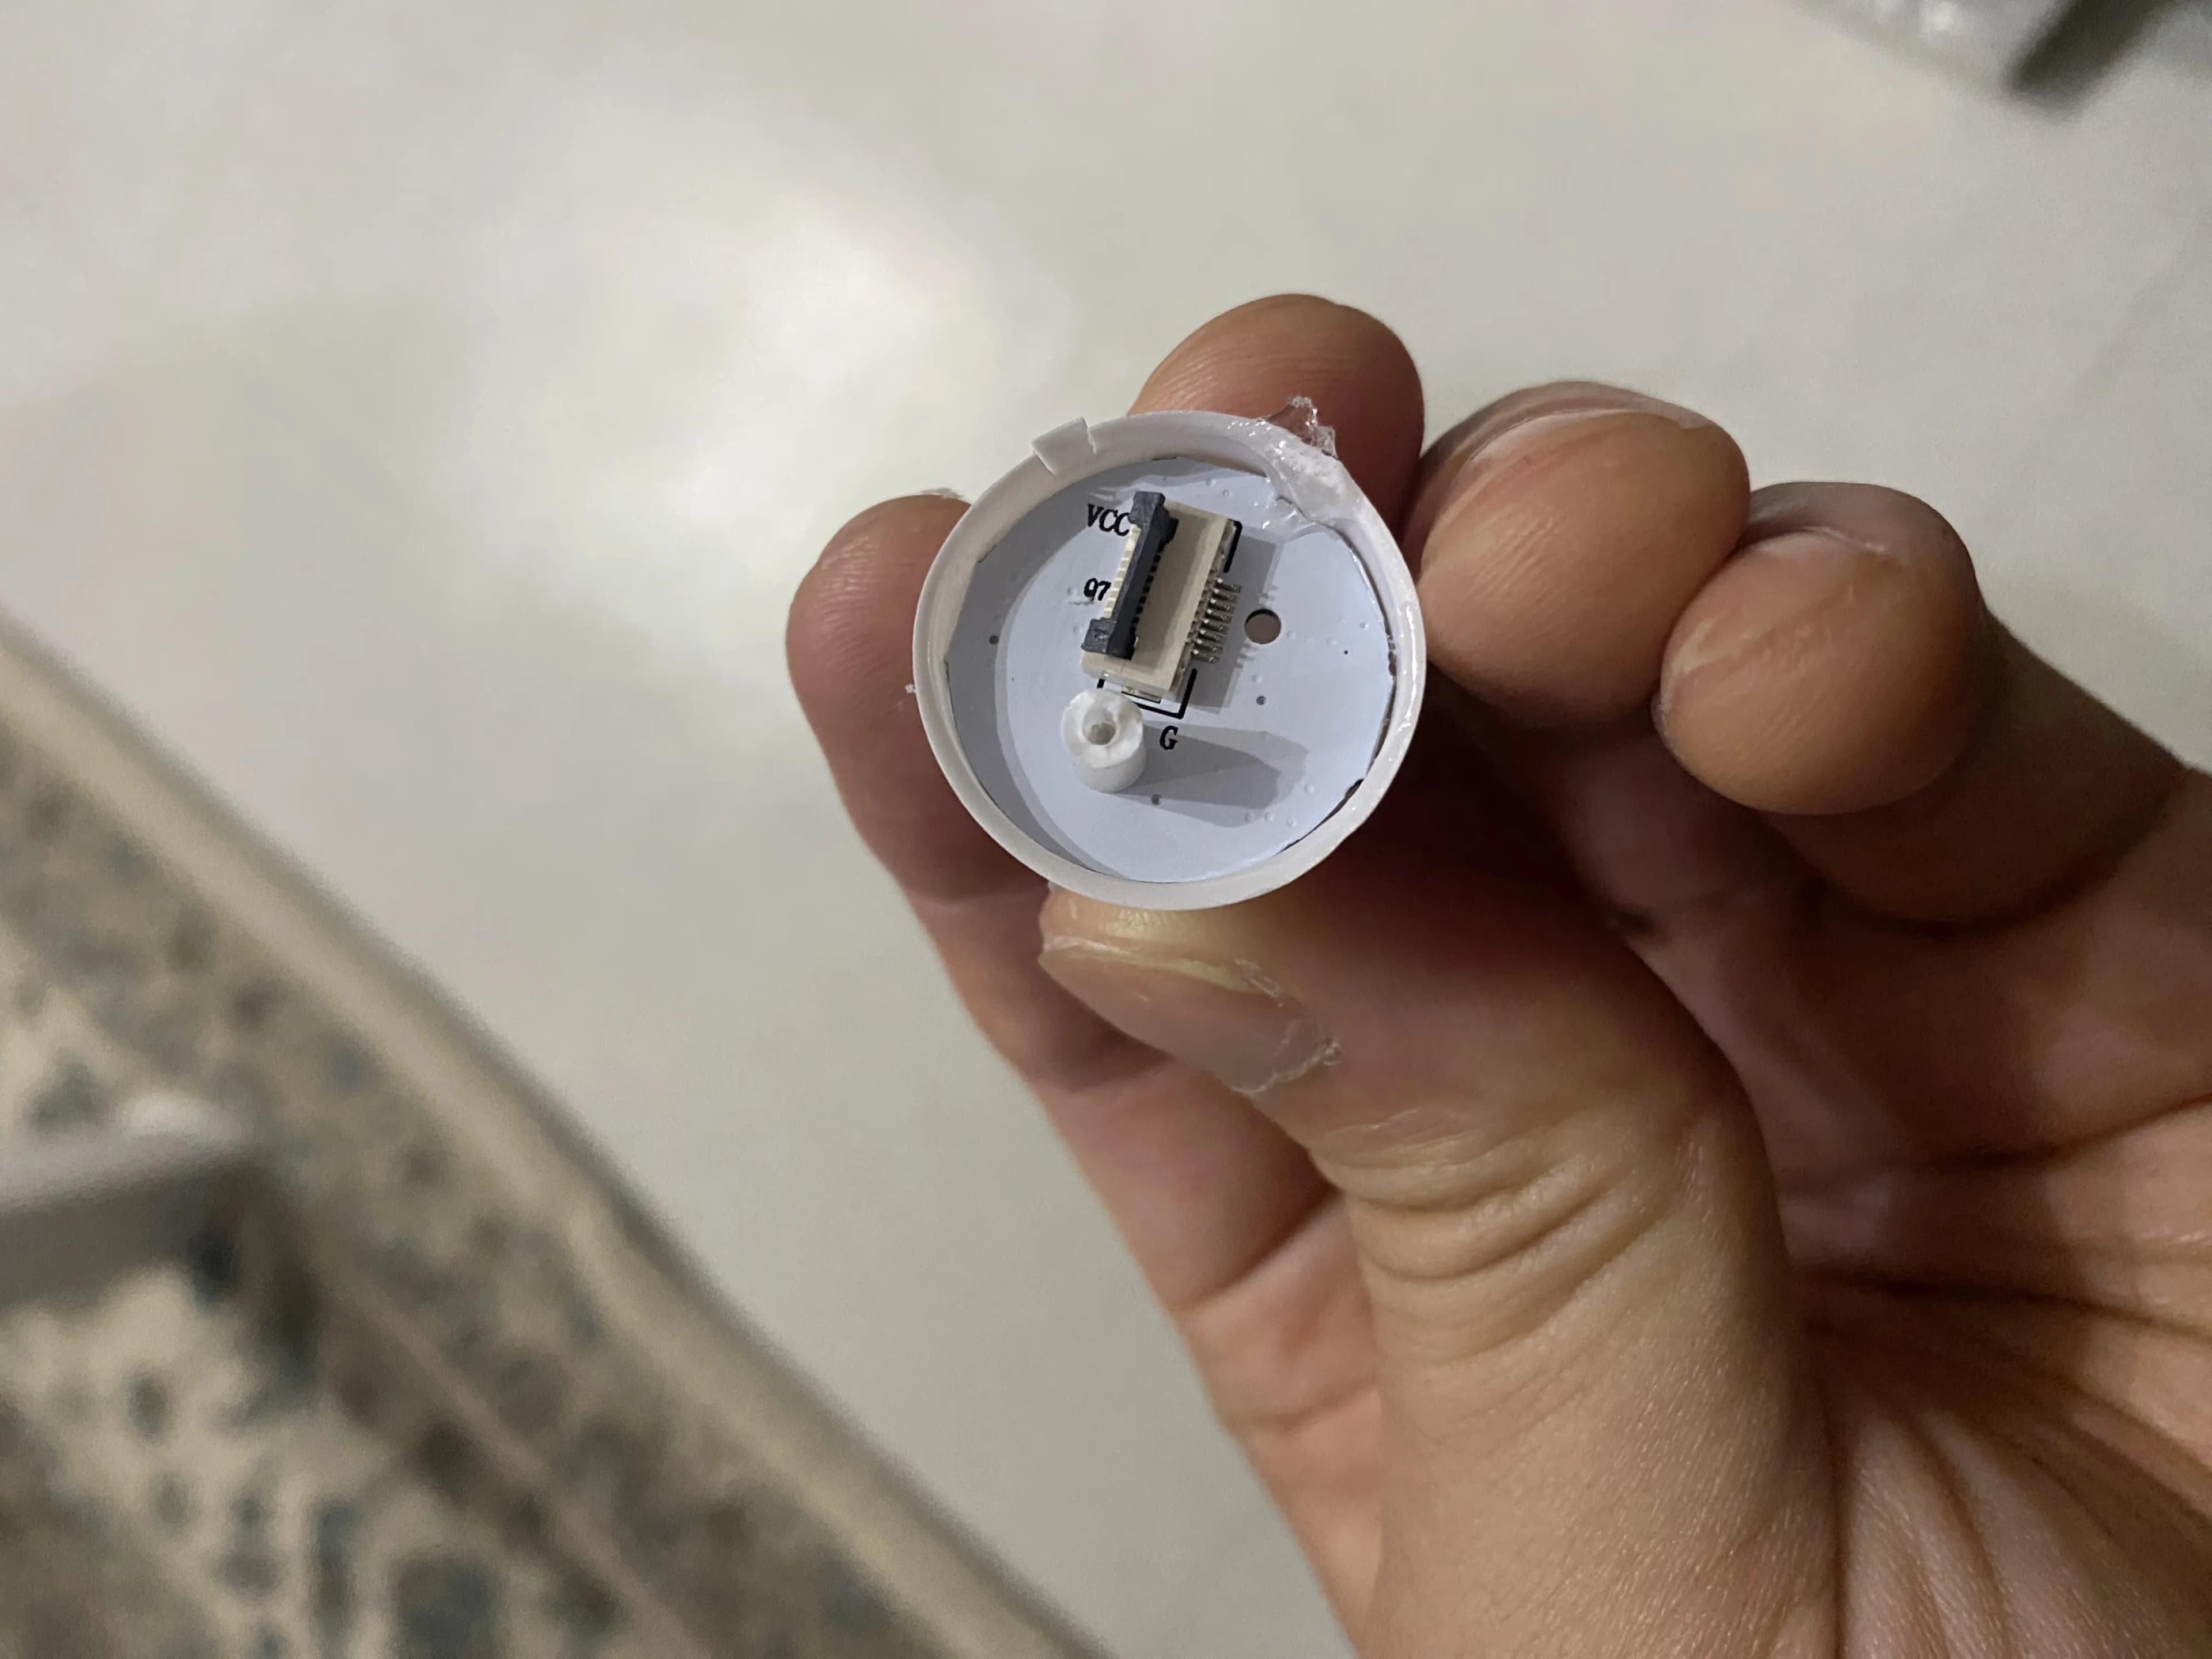
When you lift off the bottom plate, you’ll find the circuit and the battery inside.
The battery is attached to the weight that keeps the lamp balanced.
When you undo the screw, they come out together, so it’s better not to try removing the battery separately for no reason.
I didn’t manage to take photos of the middle steps.

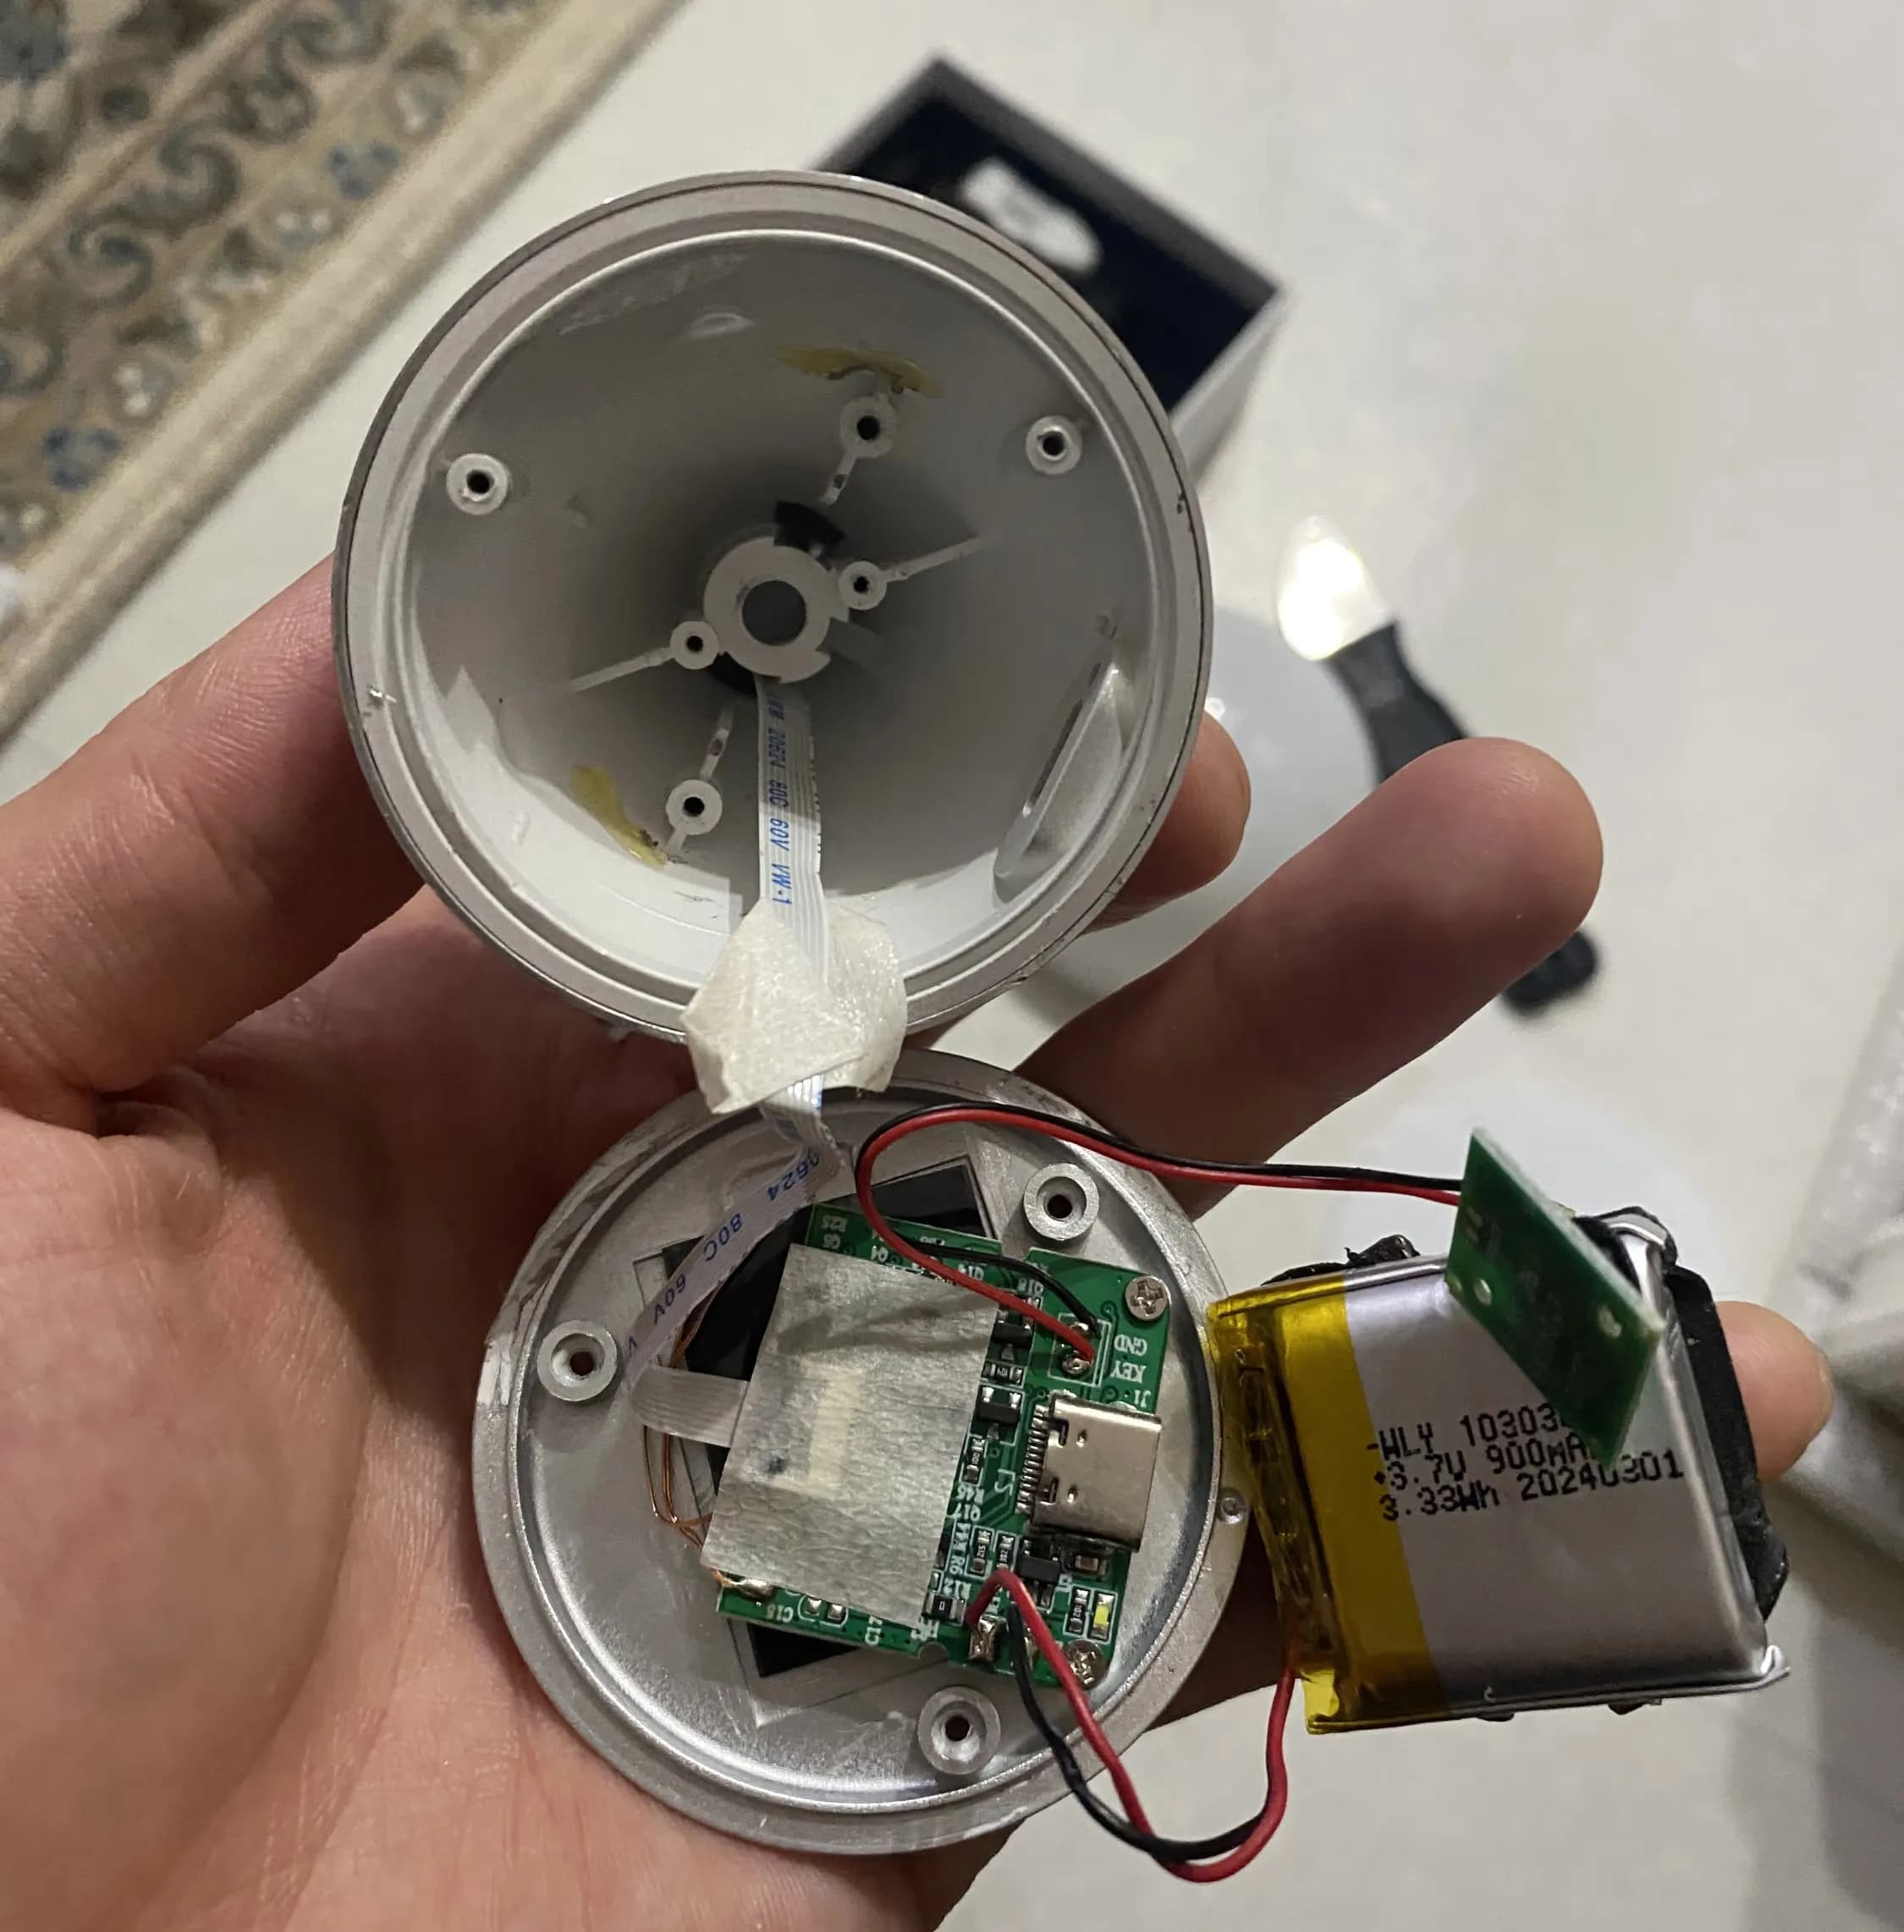
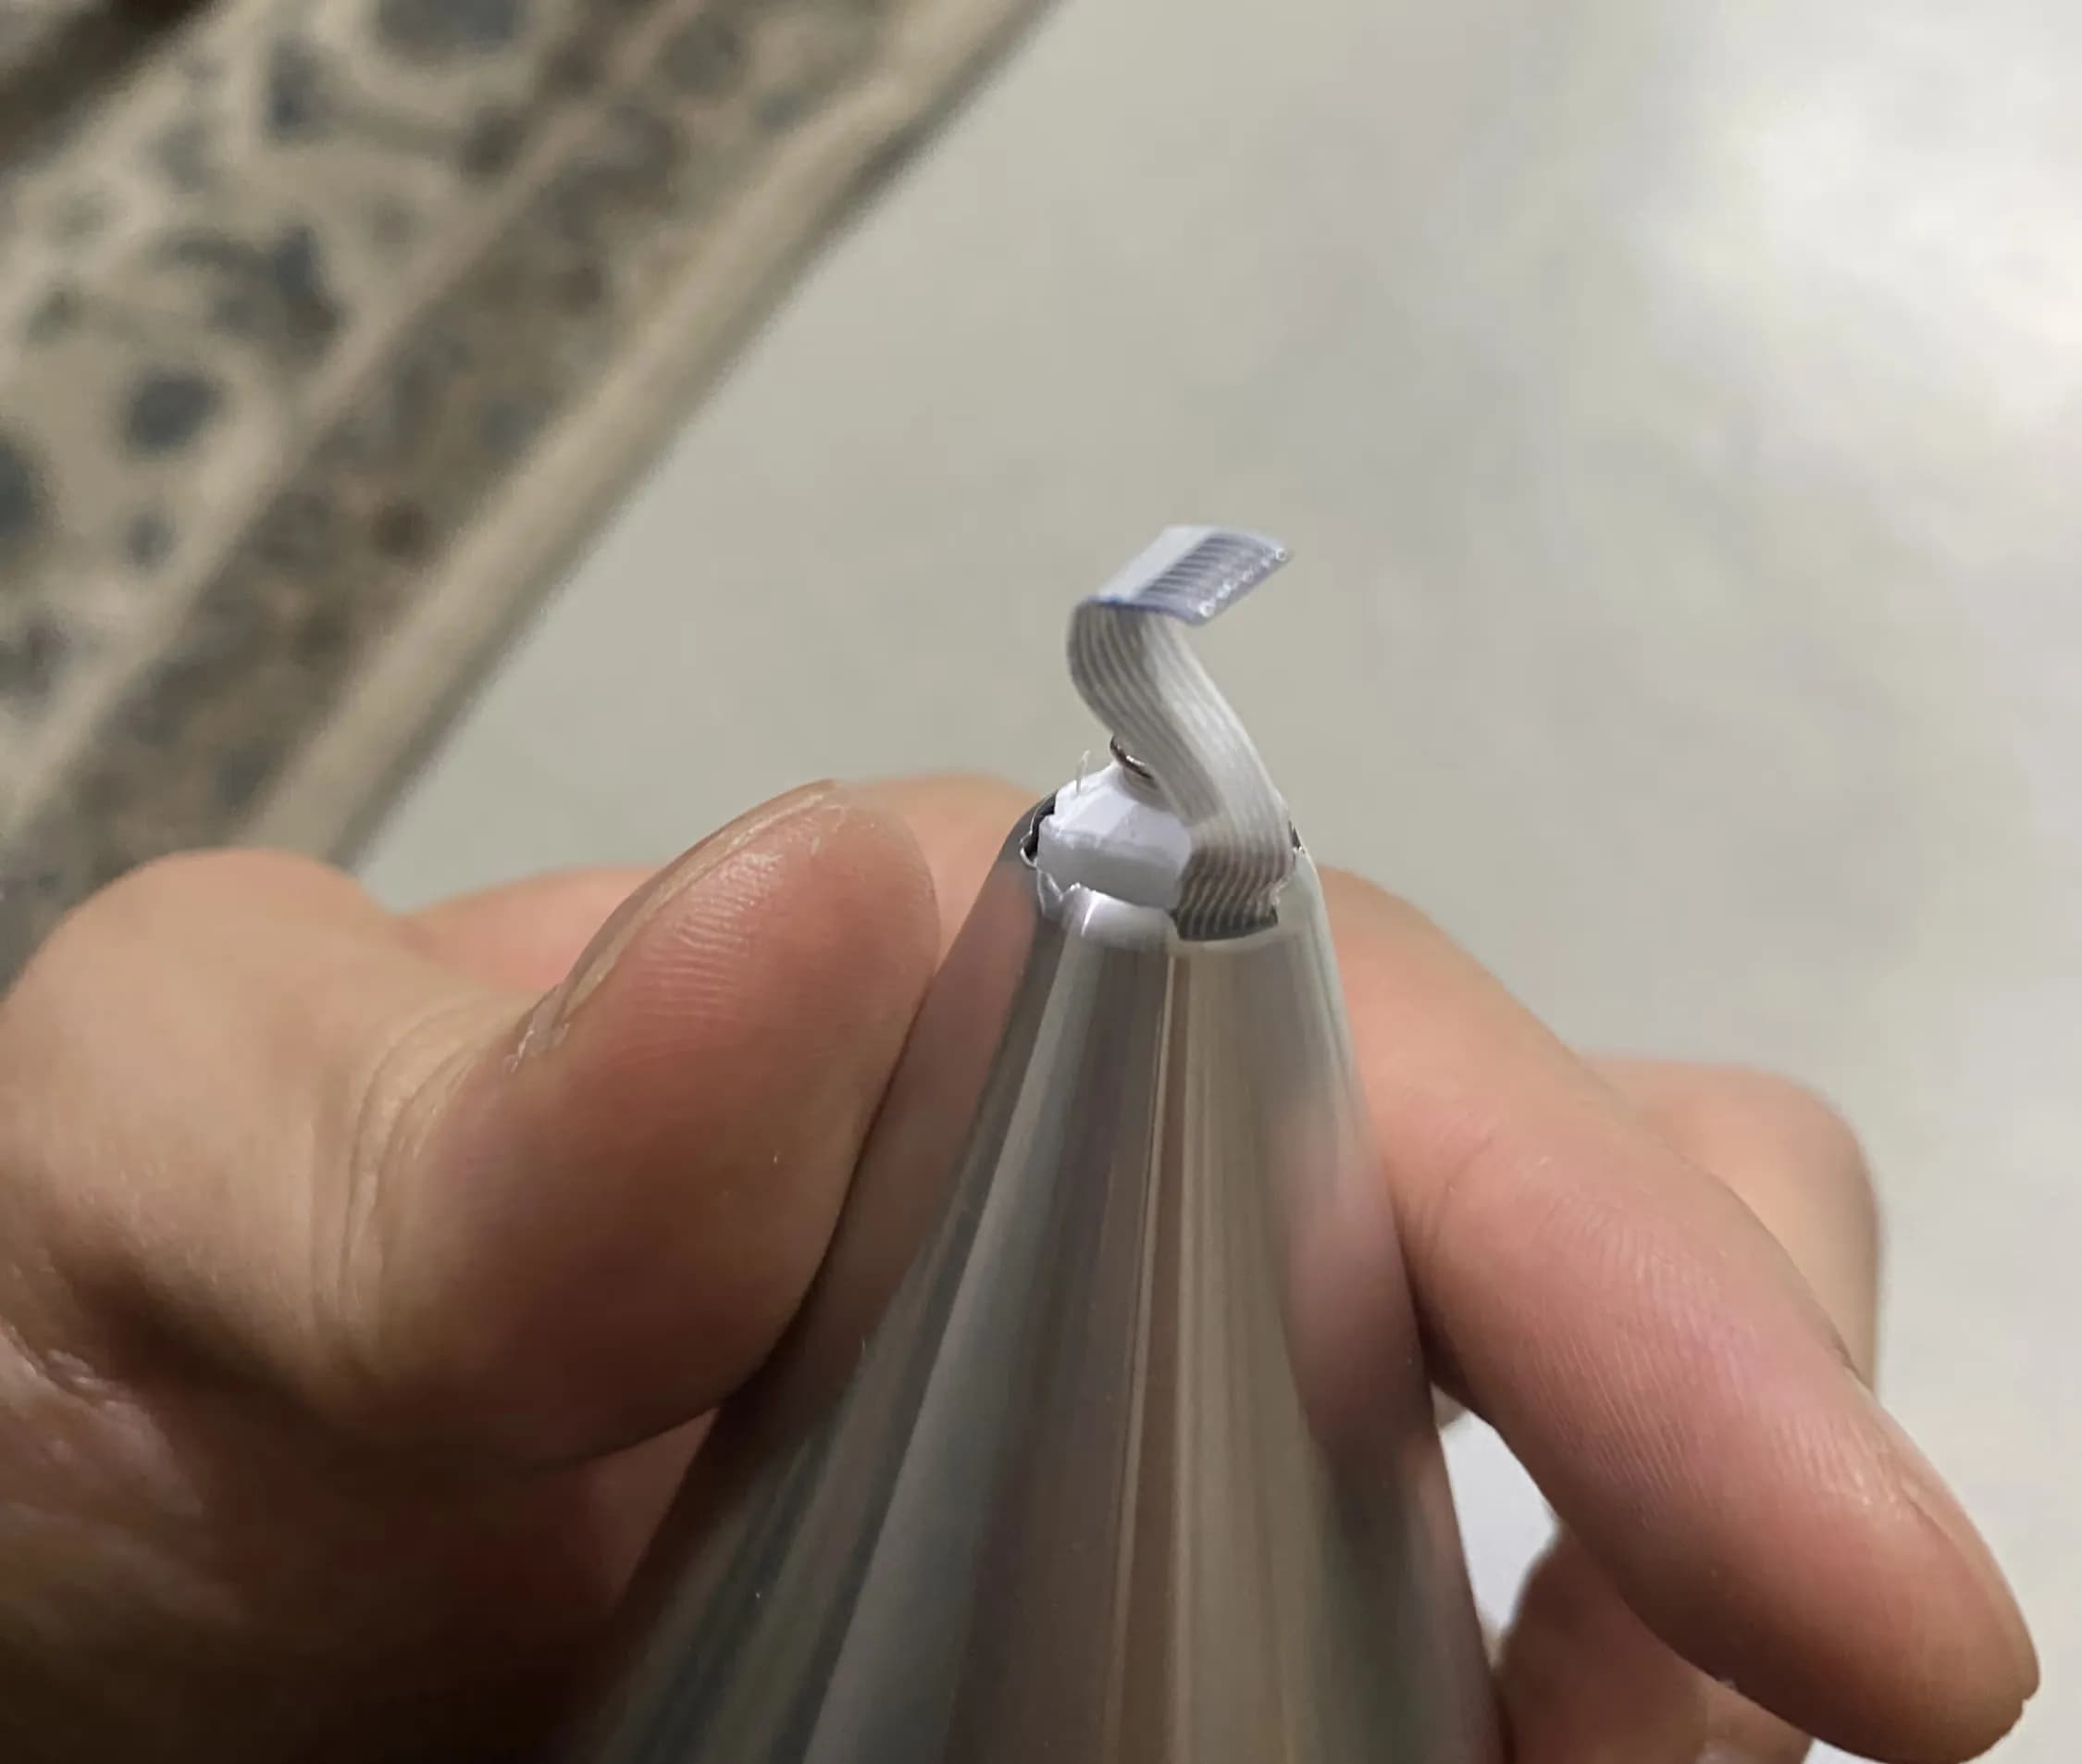
After fully disassembling it like this, I was able to get just the tip part.
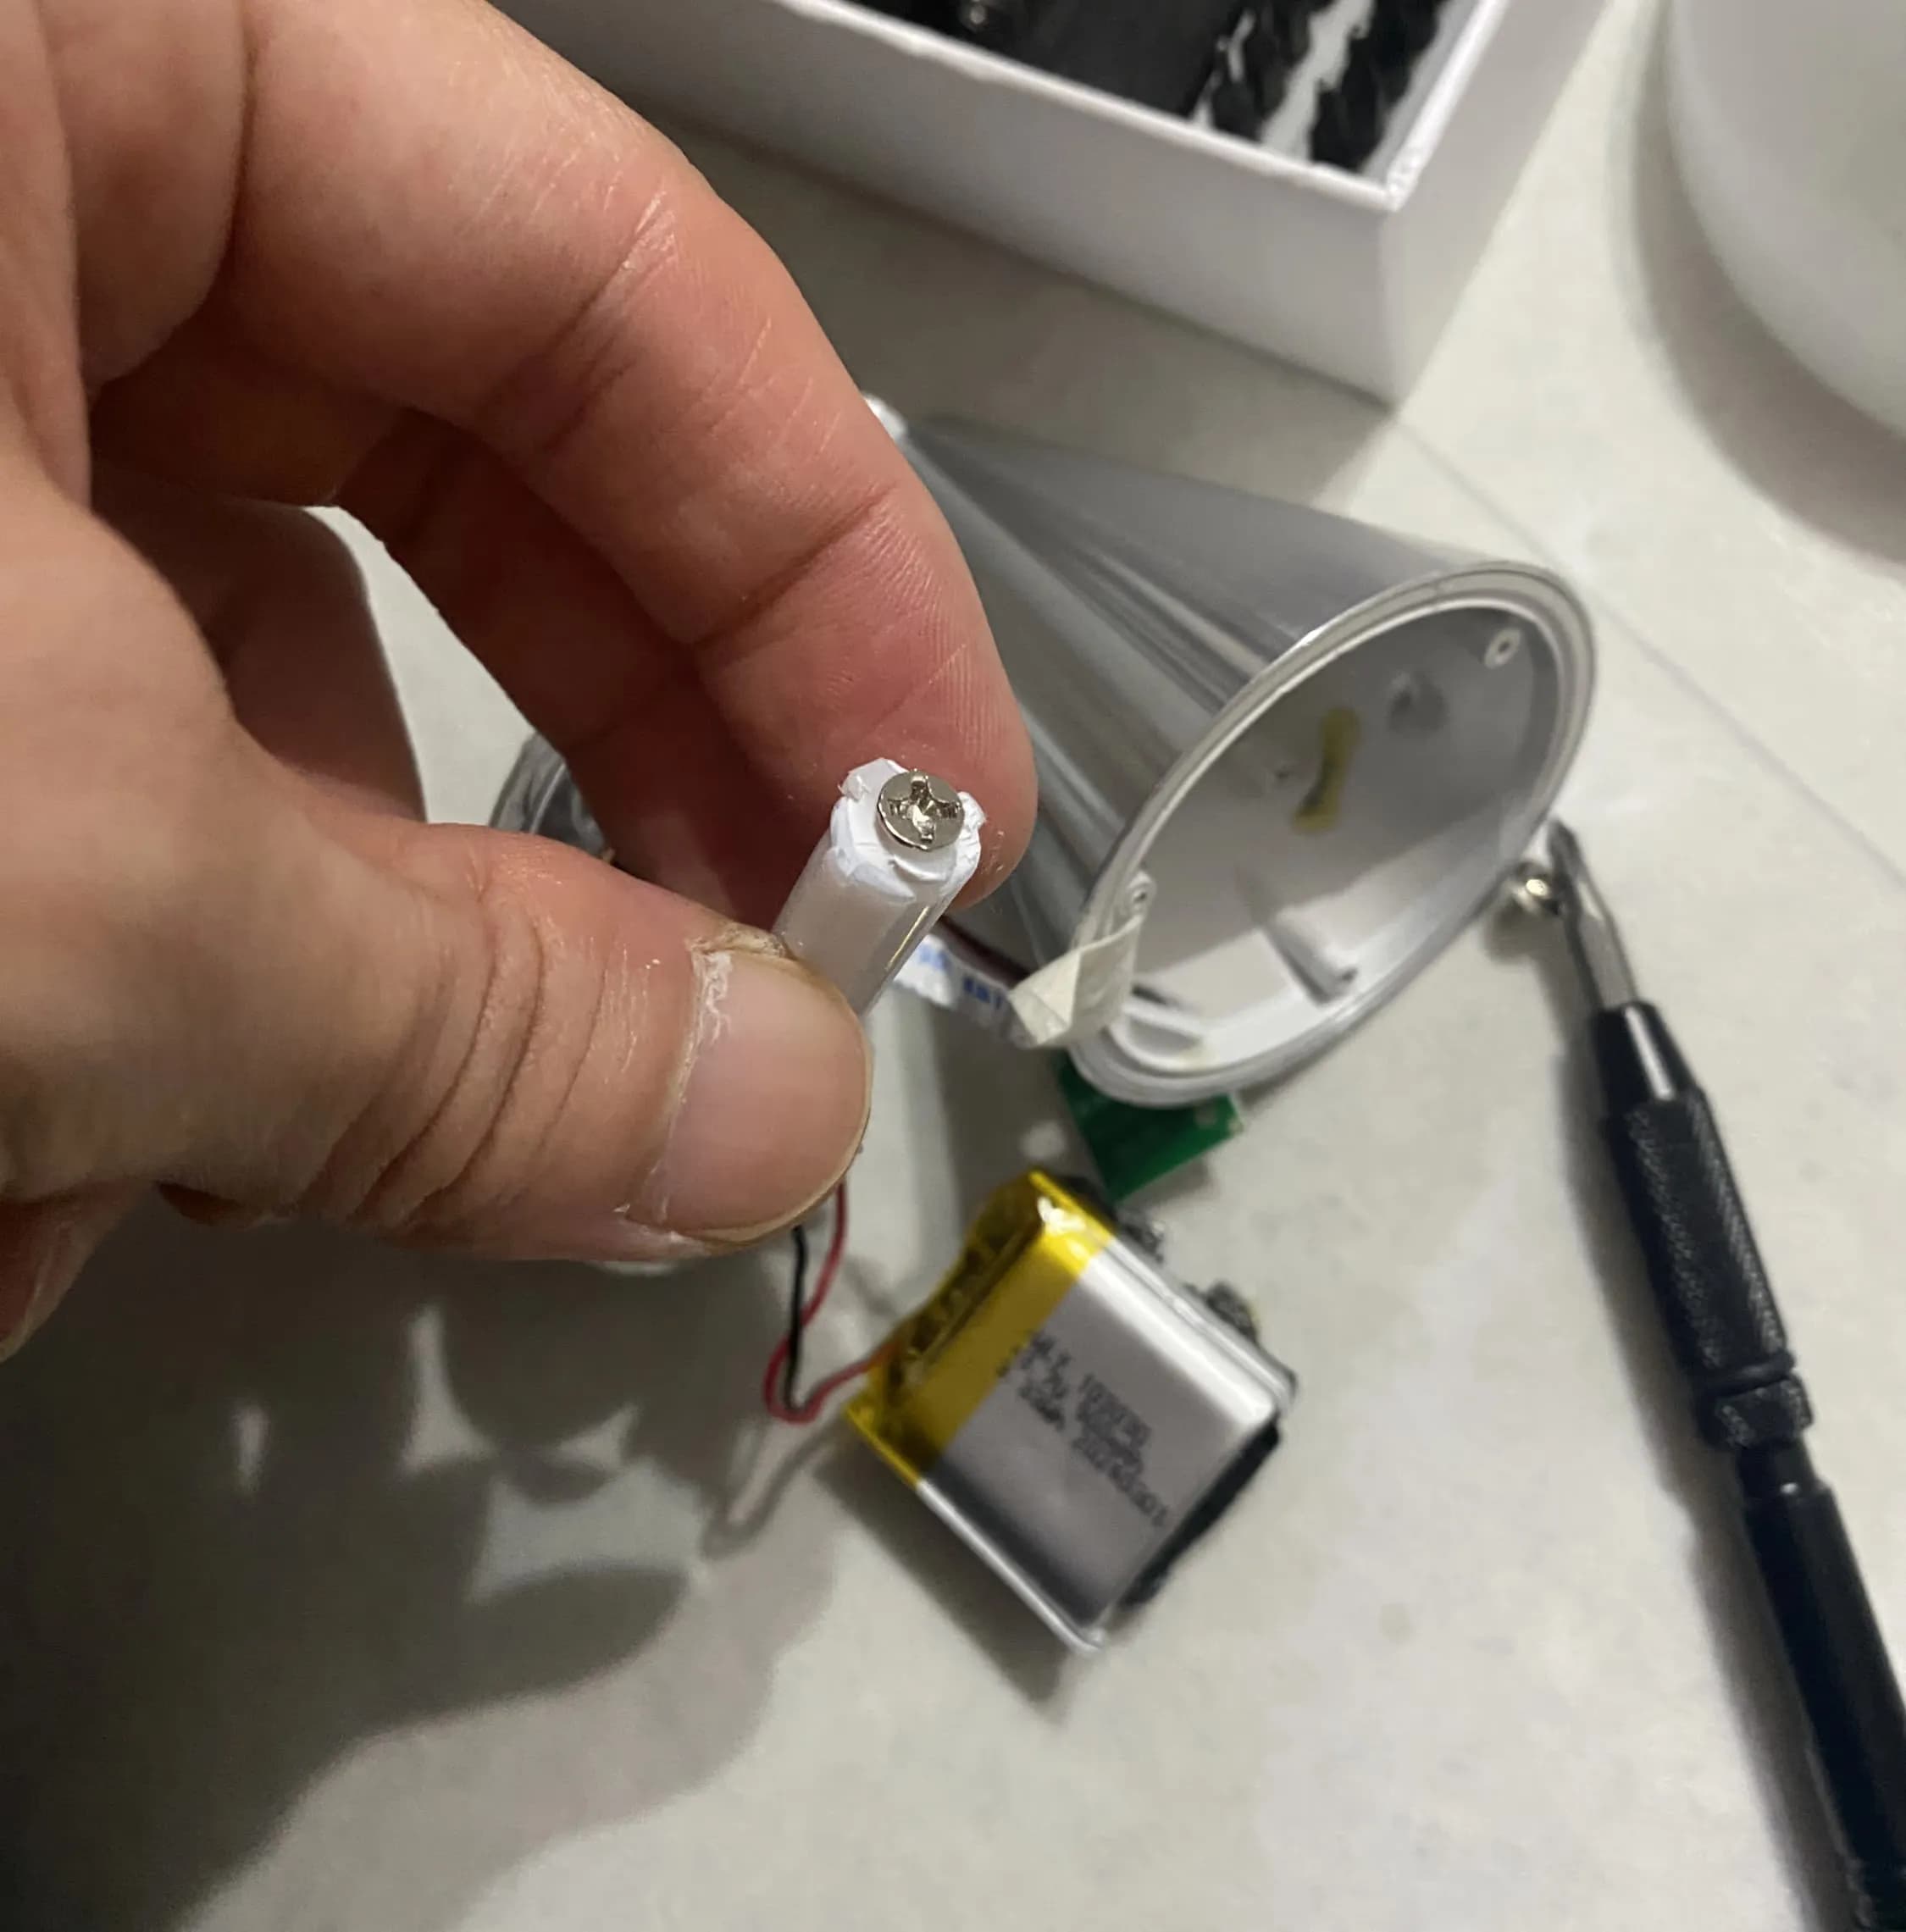
2. Repairing with a Plastic Welder
Now the problem is how to join this part back to the lamp head with the same durability as before.
In situations like this, a plastic welder is really useful.
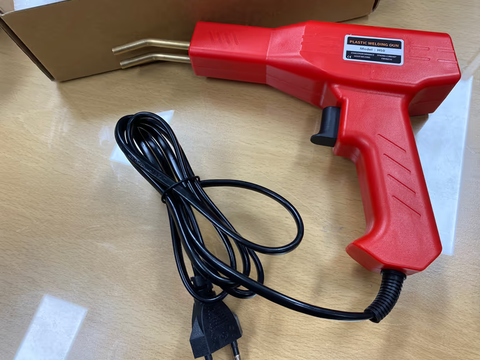
I used the plastic welder I had bought earlier to weld the two parts together.

The key to welding is to make sure the metal staple only goes about halfway into the plastic, and to give it a slight twist so the area around the weld adheres well.
If you grab the protruding ends with your fingers and bend them back and forth a few times, they’ll snap off on their own.
Since there were several broken spots, I put in about four staples.

Once the welding is done, reassembly is the reverse of disassembly.
After putting it back together and reconnecting the lamp, the light came on just fine.
All that’s left now is to secure the bulb and put the cover back on.
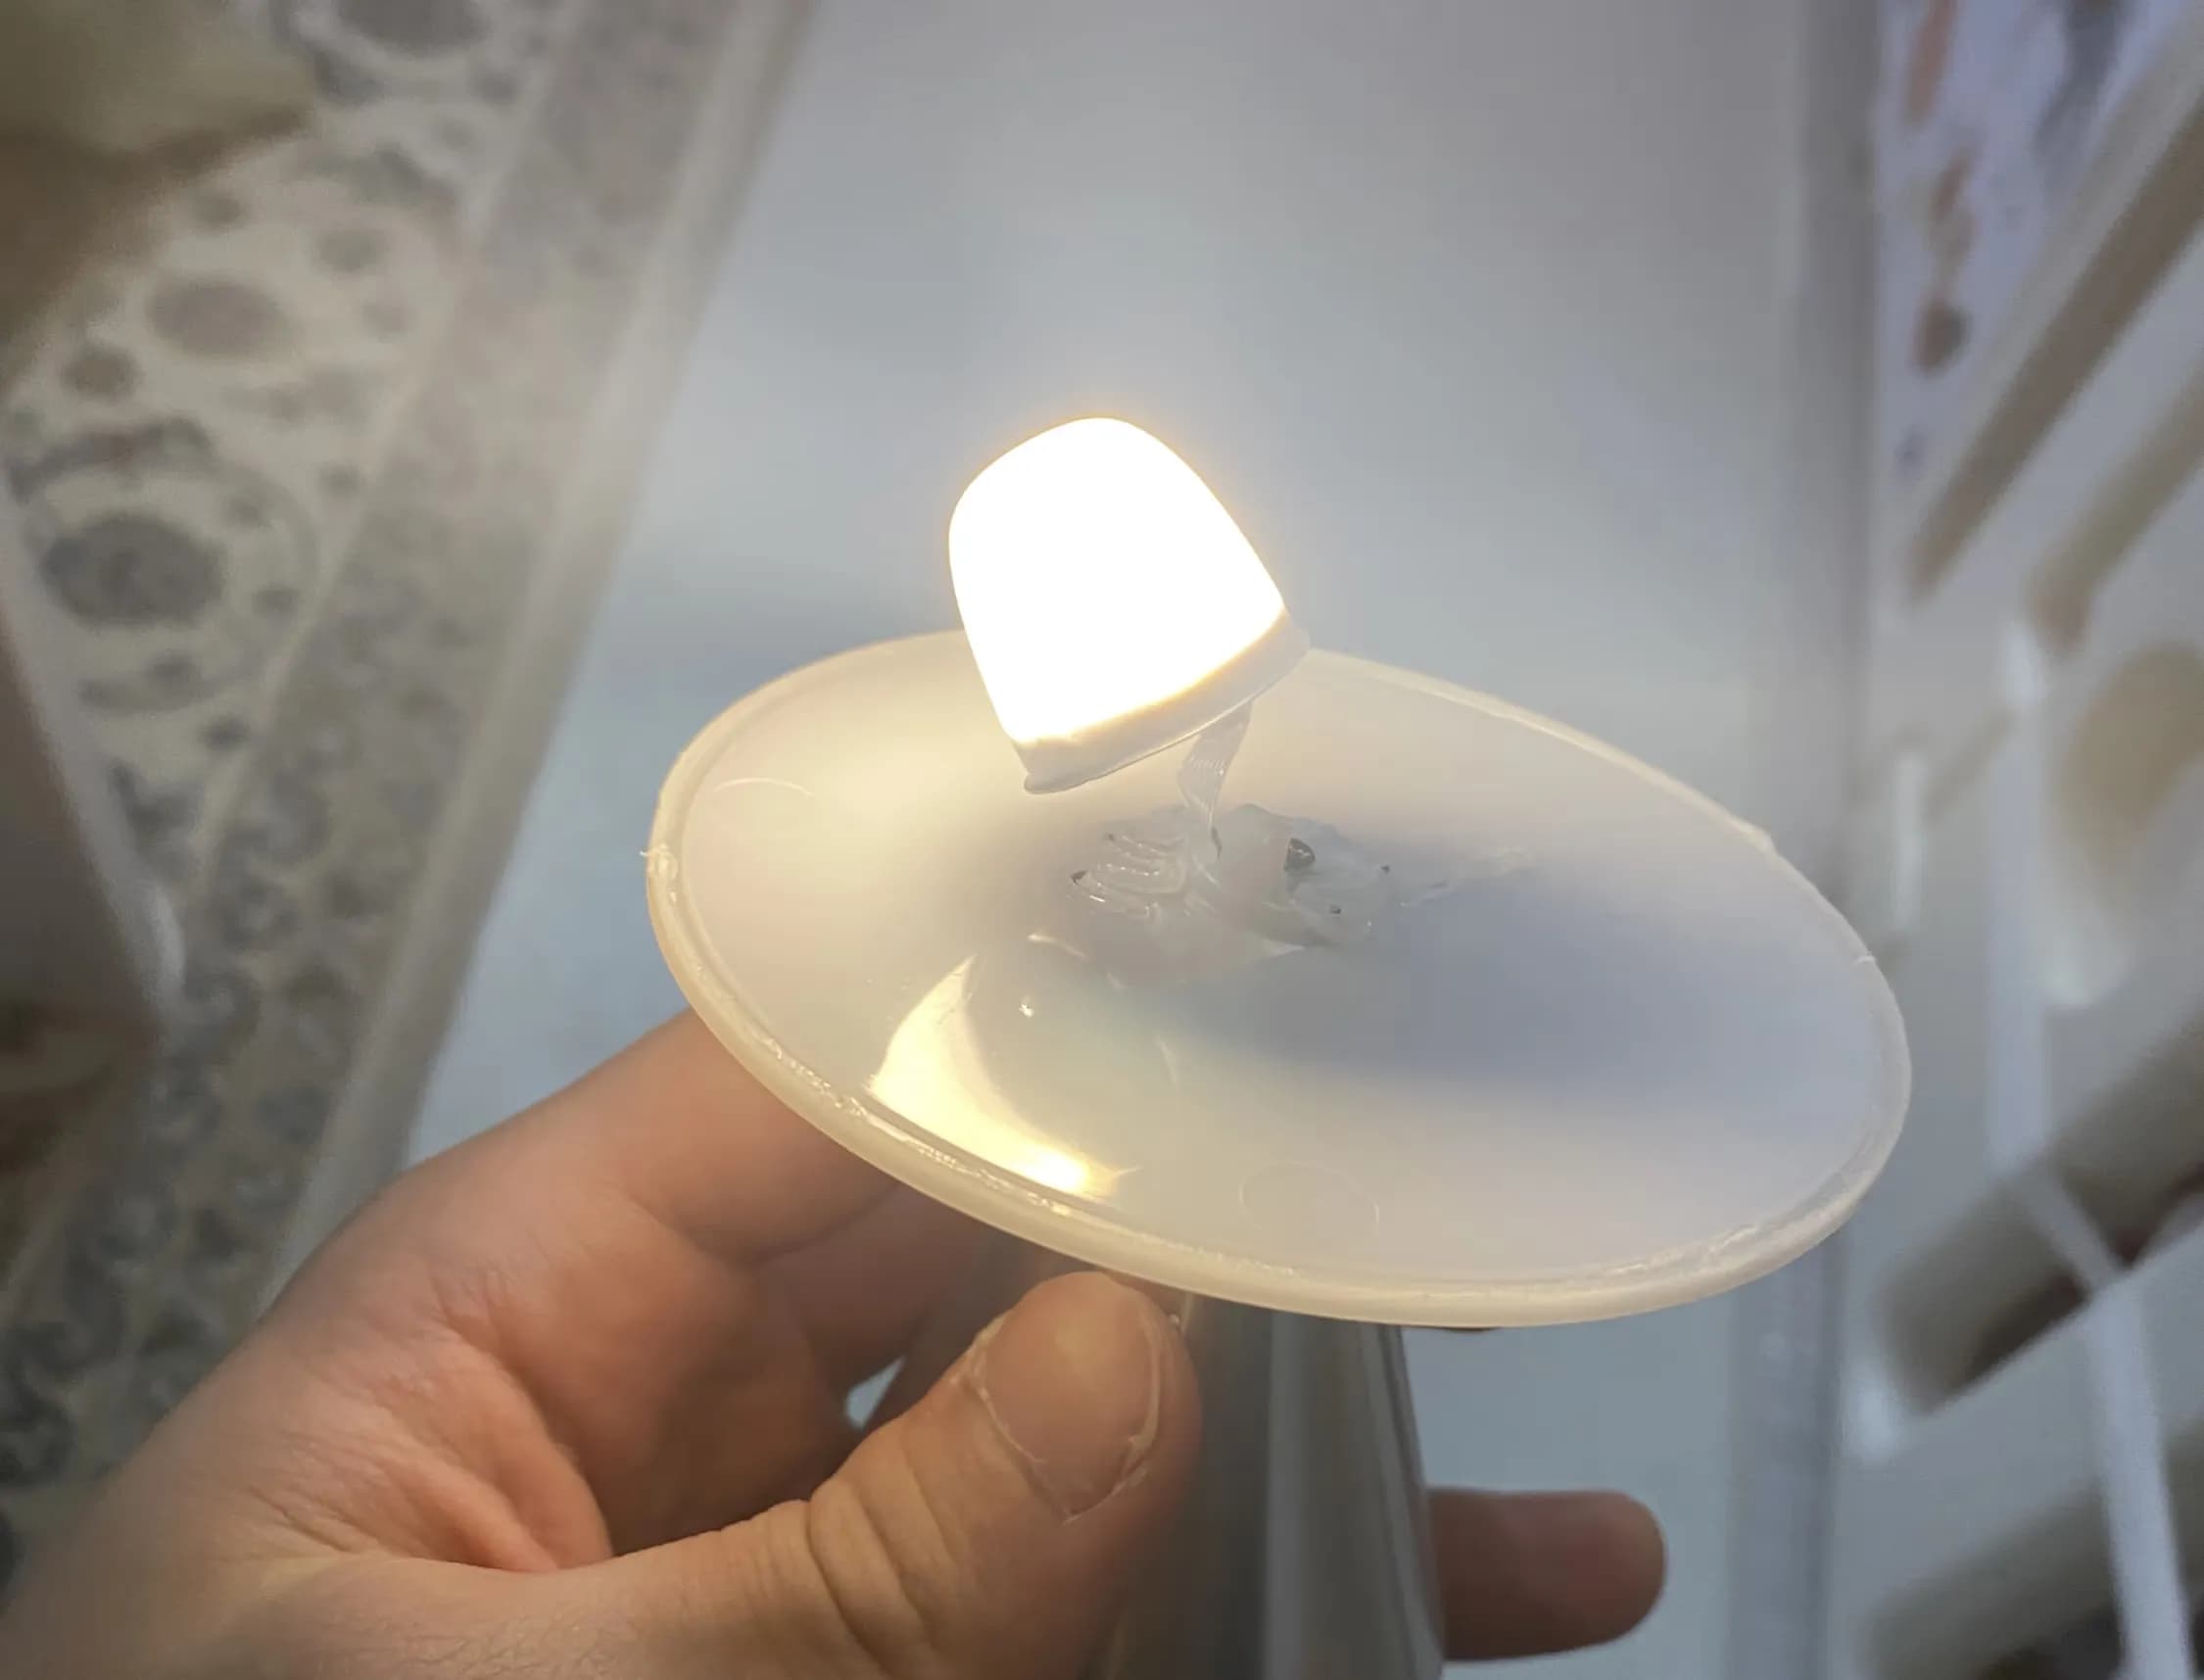
The plastic around the part where the bulb connects was so thin and small that welding didn’t seem possible.
After thinking about what to do, I secured the bulb with a glue gun.
Then I fixed the cover in place with the glue gun as well, just like the bulb.
The adhesion is decent, and if it comes off, I can just glue it back on.
3. Afterthoughts
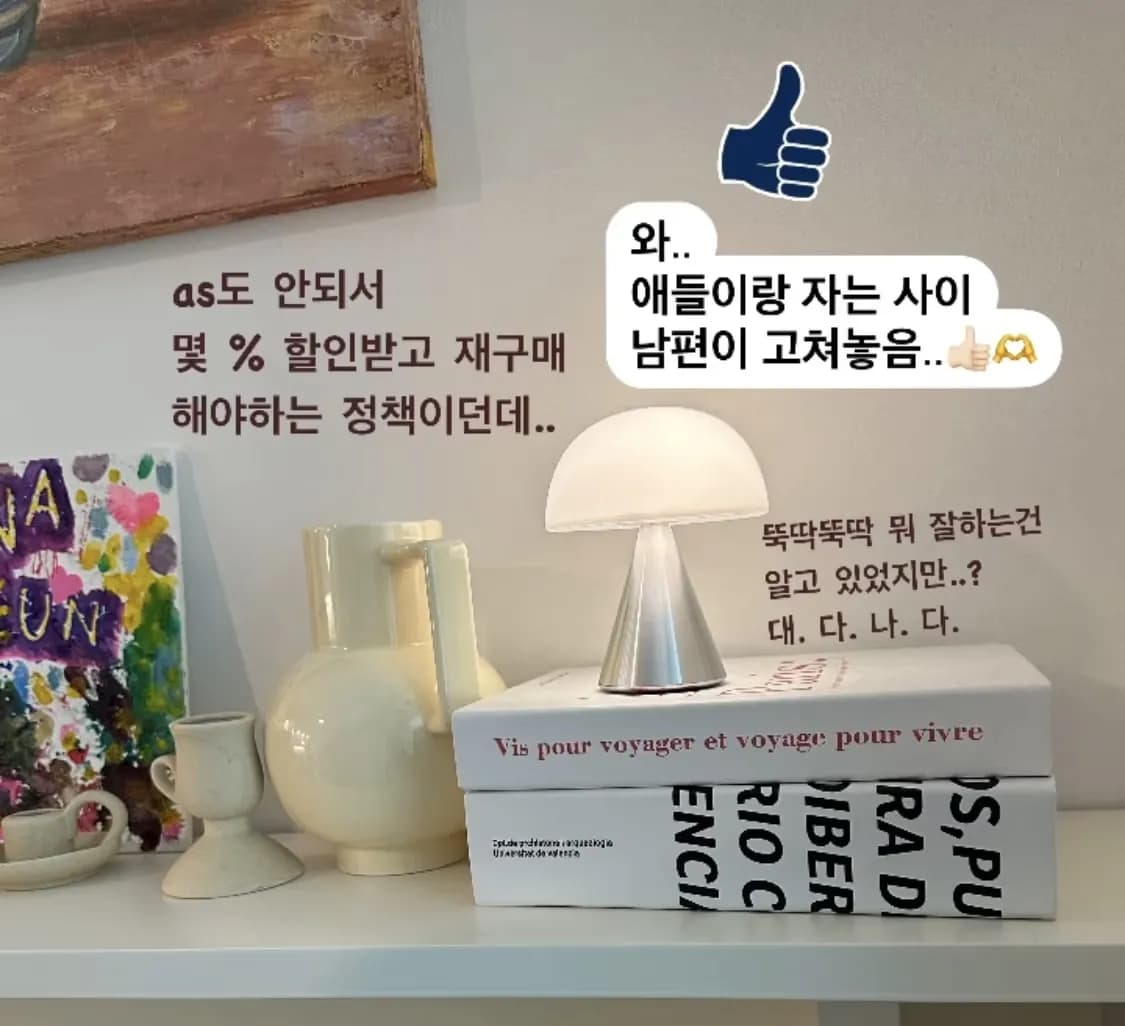
Still, once the lamp was restored to its original shape, my wife was really happy.
We’ll probably keep using it like this for a while.
It’s a real shame that A/S isn’t available despite the lamp’s high price.
If anyone hasn’t been able to take theirs apart because they don’t know the internal structure, I hope this helps.


댓글을 불러오는 중...